Wow. Has it really been TWO YEARS since I posted anything?
What can I say? I've been busy.
To add to the heap of stuff I've been up to, I've somehow managed to get myself wrangled into being a Girl Scout Leader. It's going to be so much fun, but I'm pretty sure it's going to keep me super busy.
So don't fret, I'm still here. I'm going to try to post a little something every now and then if I manage to actually do something. Maybe I'll at least show off some of the stuff I've done in the last few years.
Take care all!
Samantha

Friday, October 11, 2013

Tuesday, July 19, 2011
I'm still alive!
I'm so sorry I haven't posted anything lately. I didn't realize that it had been over a month since my last post! Things have been nuts around here! I had a little issue with fatigue for a while, but I've just about got that under control. All I wanted to do was sleep, and that isn't possible with two little girls to keep up with.
The girls have also been super-clingy and haven't been all that happy about me doing anything without them. So, I haven't been spending much time at the computer.
For those of you that are waiting for me to get the Nook and e-Reader covers into production, I really have been working on it. I keep running into small snags here and there, finding an affordable magnet supplier, working on the process so that it doesn't take sooooo long to put them together, making sure the end result is of the highest possible quality, etc. I don't want to spend hours on end on something and have people buy it and it wear out prematurely. I'd rather not sell anything than to try to sell something that's just "cheap". So, please be patient. I'm working on it as much as I can (and as much as the younglings will let me).
Kaylee turned three years old on Saturday! She's such a big girl. It's really hard to believe. Aby is talking up a storm, and learning her colors (at 17 months, I think that's pretty good!). They both want to help mommy cook all the time, which is cute but sometimes hinders the whole process a bit. But, they gotta learn, right?
As far as us local folks getting together, you tell me. We have both cars back, so no transportation problems there. Just let me know what you guys want to do and I'll make it happen.
How have you all been? I've missed everybody, so let's catch up!
The girls have also been super-clingy and haven't been all that happy about me doing anything without them. So, I haven't been spending much time at the computer.
For those of you that are waiting for me to get the Nook and e-Reader covers into production, I really have been working on it. I keep running into small snags here and there, finding an affordable magnet supplier, working on the process so that it doesn't take sooooo long to put them together, making sure the end result is of the highest possible quality, etc. I don't want to spend hours on end on something and have people buy it and it wear out prematurely. I'd rather not sell anything than to try to sell something that's just "cheap". So, please be patient. I'm working on it as much as I can (and as much as the younglings will let me).
Kaylee turned three years old on Saturday! She's such a big girl. It's really hard to believe. Aby is talking up a storm, and learning her colors (at 17 months, I think that's pretty good!). They both want to help mommy cook all the time, which is cute but sometimes hinders the whole process a bit. But, they gotta learn, right?
As far as us local folks getting together, you tell me. We have both cars back, so no transportation problems there. Just let me know what you guys want to do and I'll make it happen.
How have you all been? I've missed everybody, so let's catch up!
Wednesday, June 8, 2011
Next meeting for local Conspirators!
Okay, Kim and I are thinking this coming Tuesday, June 14th at 2:00 or 2:30. My husband and I are down to one car at the moment, so I have to leave no later than 4:45. I'm leaving this to Kim to fill in the rest of the details in the comments section. She might show up as "Maroon" so just know that it's her.
Happy Crafting!
Samantha
Happy Crafting!
Samantha
Tuesday, June 7, 2011
If River Song had a Nook...
After several prototypes, I finally finished this. I was going to enter it into the "Where's the TARDIS?" contest, but I was just a bit too late. Since this first one is a gift for our friend Jenny (aka @Meadhbh on Twitter, among other things), I couldn't unveil it until now. (I broke down and mailed it to her, she LOVED it.)
If you don't know what that is below, or who River Song is, stop what you're doing right now and go watch Doctor Who. You can watch all of the "new" series all the way up to the current season on Netflix. The significance of River Song's diary becomes apparent in Series 4 and up. I'll admit I haven't watched the older series, but I'm totally caught up in them now. That said, I don't honor myself with the full-blown title of hardcore "Whovian", but I am a fan. Enough of my rabbit-trailing...

 (Photos taken with my mother-in-law's Nook. It fit in there nice and snugly, which I was almost to the point of having nightmares about.)


Except for the inside lining (which is fabric), and the magnets and steel plates for the closure, the entire thing is made of PAPER, chipboard, and copious amounts of glue. Lots of little pieces glued up and then embossed... let's just say it took a bit of time to put together. Now that I know what I'm doing, I'm sure the next one won't take quite as long.
It still hasn't been really used yet, so I'm going to get some input from Jenny after she uses it for a little bit, if it needs any more tweaking. Especially the part that holds the Nook in place.
If anyone is interested in one, please email me. No idea how much I would charge for one, because it's more time and labor intensive than it is expensive to make. But I wouldn't charge enough to pay myself minimum wage for all the time I put into it, if that tells you anything.
All in all, I'm proud of what I made. What do you think?
If you don't know what that is below, or who River Song is, stop what you're doing right now and go watch Doctor Who. You can watch all of the "new" series all the way up to the current season on Netflix. The significance of River Song's diary becomes apparent in Series 4 and up. I'll admit I haven't watched the older series, but I'm totally caught up in them now. That said, I don't honor myself with the full-blown title of hardcore "Whovian", but I am a fan. Enough of my rabbit-trailing...


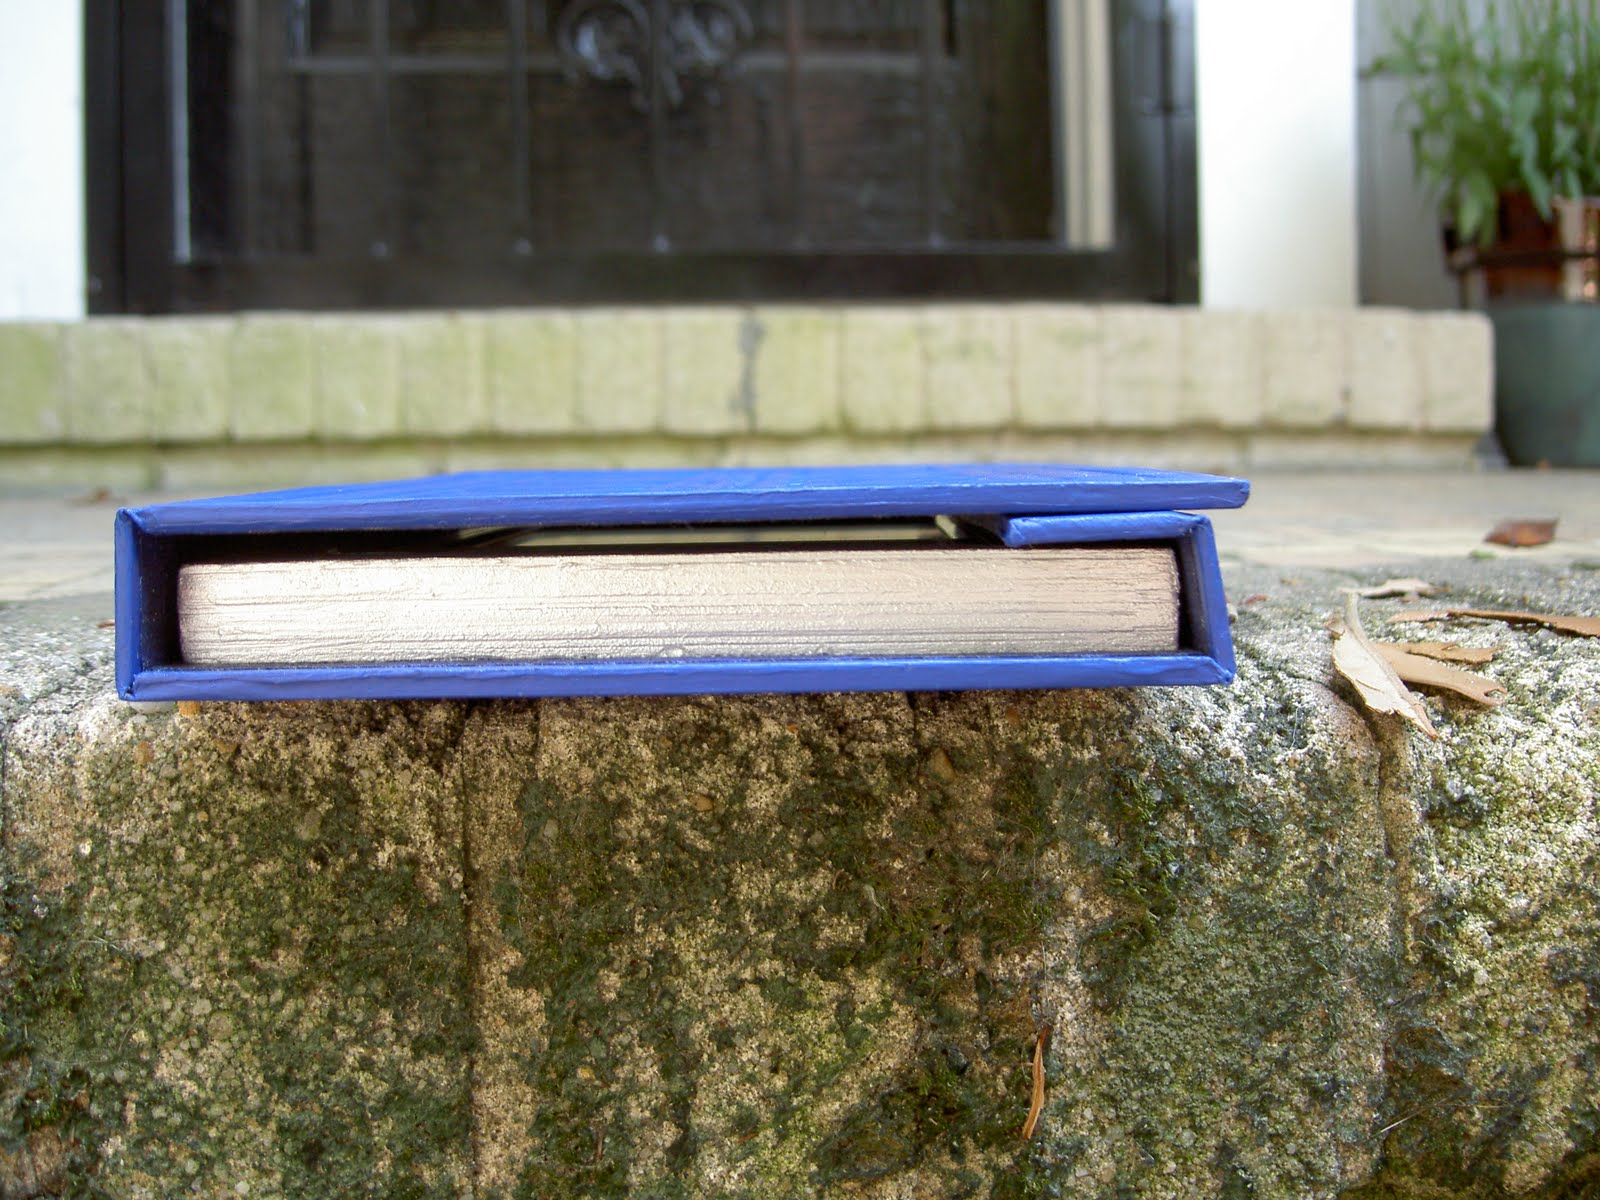

Except for the inside lining (which is fabric), and the magnets and steel plates for the closure, the entire thing is made of PAPER, chipboard, and copious amounts of glue. Lots of little pieces glued up and then embossed... let's just say it took a bit of time to put together. Now that I know what I'm doing, I'm sure the next one won't take quite as long.
It still hasn't been really used yet, so I'm going to get some input from Jenny after she uses it for a little bit, if it needs any more tweaking. Especially the part that holds the Nook in place.
If anyone is interested in one, please email me. No idea how much I would charge for one, because it's more time and labor intensive than it is expensive to make. But I wouldn't charge enough to pay myself minimum wage for all the time I put into it, if that tells you anything.
All in all, I'm proud of what I made. What do you think?
Wednesday, May 25, 2011
Busy busy
Just wanted to let you guys know I'm still around and kickin'! I've had several projects going on, the main one I finished Monday morning! Can't post pics of it yet, because it is a gift for a friend, and I don't want any spoilers.
Local people, let me know when we want to get together. I did hear from Brandie, she just hasn't had computer access lately.
Happy Crafting!
Samantha
Wednesday, May 11, 2011
Successful meeting! What next?
We had a good time yesterday! All of us actually managed to just about finish making our books, so that is a success in my book.
Now the question: what do you guys want to do next, and when?
There are a few things I have in mind, but if you guys have any suggestions or requests, let's hear 'em!
I found a tute online for making roses out of egg cartons, and I made three and they turned out pretty well, but I don't know what I want to do with them. I'm adding a picture below, but this is a first for me adding a pic from my phone, so we'll see how it looks.
If you guys enjoyed bookbinding, I can show you how to make a book similar to the one we made yesterday, but with a soft cover. Or we can tackle another method completely.
I had some success embossing the metal from a soda can, but I'm still trying to figure out what to do with that, too. (Adding another picture).
Also, I saw several things made from toilet paper/paper towel tubes that I'm itching to try.
We could tackle a sewing project, perhaps. I'm open to suggestions. Would any of you like to share something?
Also, when do you guys want to do this? Next week is out for me, I have a few projects of my own to finish and appointments to go to. How about the week after that?
Comment away, you guys!


Now the question: what do you guys want to do next, and when?
There are a few things I have in mind, but if you guys have any suggestions or requests, let's hear 'em!
I found a tute online for making roses out of egg cartons, and I made three and they turned out pretty well, but I don't know what I want to do with them. I'm adding a picture below, but this is a first for me adding a pic from my phone, so we'll see how it looks.
If you guys enjoyed bookbinding, I can show you how to make a book similar to the one we made yesterday, but with a soft cover. Or we can tackle another method completely.
I had some success embossing the metal from a soda can, but I'm still trying to figure out what to do with that, too. (Adding another picture).
Also, I saw several things made from toilet paper/paper towel tubes that I'm itching to try.
We could tackle a sewing project, perhaps. I'm open to suggestions. Would any of you like to share something?
Also, when do you guys want to do this? Next week is out for me, I have a few projects of my own to finish and appointments to go to. How about the week after that?
Comment away, you guys!
Saturday, May 7, 2011
Bookbinding Update
I just finished putting together a hardcover book I'd been working on for a while, so that the process would be fresh in my mind for writing Part Four of the tutorial. It is the trickiest part of putting the book together, to tell you the truth.
I had a little trouble with it, and it didn't turn out quite as well as I had hoped. For one thing, my spine piece is a little too wide, so I'm going back and editing the previous post's measurements for the spine before anyone else makes the same mistake I did.
Also, I think from here on out, I'm going to stick to using cardstock for my end papers/fly pages, since it doesn't bubble on you as much.
Learn from my mistakes, friends. I hope I do.
I had a little trouble with it, and it didn't turn out quite as well as I had hoped. For one thing, my spine piece is a little too wide, so I'm going back and editing the previous post's measurements for the spine before anyone else makes the same mistake I did.
Also, I think from here on out, I'm going to stick to using cardstock for my end papers/fly pages, since it doesn't bubble on you as much.
Learn from my mistakes, friends. I hope I do.
Friday, May 6, 2011
RSVP for this Tuesday's Meeting!
I'm doing a lot of prep work for our bookbinding class, so I really need to know who is coming no later than Monday at noon, so that I have enough materials prepared for you guys. We're going to have a lot of ground to cover, so if we're going to try to do it all in one go, I'm trying to have as much done ahead of time as possible!
Thursday, May 5, 2011
Book Binding, Part Three: Preparing the Cover
To me, this is the most exciting part, because you can be really creative with what you do to the cover. You can cover the outside with fabric, vinyl or paper, emboss the cover (that's a future post), decoupage it... Whatever you want to do! I'm going simple on the first one, we'll get into more advanced stuff later on. **Note: Using fabric for a cover is a little trickier than using paper, since glue can seep through. You might have to use an alternate method of adhering the fabric to the book boards, but I haven't done much with fabric yet, so I'll have to fill you in later on when I venture down that road.
I'm using a sheet of scrapbook paper for the cover on the outside this time, because I have some lovely scrapbook paper on hand, and it's big enough (12" by 12").
Before we start cutting the paper, let's get the book boards ready. As I said in part one of this tutorial, I use whatever I have handy, cereal boxes, chipboard, whatever. I'm tempted to call up an acquaintance of mine that runs a framing shop (as in picture framing) and asking them for their cast off mat board scraps. I would not use corrugated cardboard, though, you need the density of a solid material. When I use cereal boxes, I glue the printed sides together and stack books on top so that it dries nice and flat, then cut it out carefully when it's dry.
Measurements for the book boards should be as follows: The front and back cover should be 1/8" wider than your book blank (that's what I'm calling all the signatures that are all sewn and glued together), and 1/4" taller than the book blank. The spine will be the same height as the front and back cover, and 1/8" narrower than the thickness of the book blank at the spine. (Remember when I told you to measure that?)
For the example, our book blank is 8 1/2" by 5 1/2". So, the covers need to be 8 3/4" by 5 5/8". My book measures 1/2" thick, so the spine piece is 8 3/4" by 3/8". That wasn't so hard, now was it?
Now to cut the paper for the cover. I did a little illustration to help explain:

It usually works for me to glue the book boards to the paper about 1/2" from the bottom left and then cut the excess paper off, but that's just how I work. I like to draw a thin pencil line 1/2" up from the bottom and left side to line up my pieces, keeping them straight and even (especially if you're using a patterned paper that will look bad if it's crooked). The 1/8" gap between the spine and the front and back pieces are to allow the book to close. If you don't leave the gap here, you'll run into all sorts of problems. If you're using really thick book board, you will need to leave a larger gap. Test it out with a few scrap pieces of your book board and then try to fold it to a 90 degree angle. On the flip side, if you leave too big of a gap here, it will look sloppy and bunch up on you.
While that's setting up, I have a confession to make. I forgot a step to mention in the previous posts. I'm sorry. You forgive me, right? That's good. After the glue is dry on the signatures that you have stitched and clamped, there is one more step to prepare it completely. We need to add a piece of fabric to the spine. I'll be honest, I don't know what the proper type of fabric to be used should be made of. I don't even know why exactly you do this, but I imagine it adds a lot more stability to the spine so that it's not only glue holding most of it together. The type of fabric I use is just an old cloth diaper that I have cut up. (Don't worry, it's clean and has not been used on baby bottoms.) I would stick to thin cottons, no synthetics, and no bright colors or prints. Cut the fabric to a height that is 1 inch shorter than the spine of the book. We're going to trim the excess width later, so a little extra on the sides is fine.
Start folding the paper over the board (if you're using cardstock, you will want to score it a little bit to get a clean fold) and look at it to make sure your corners line up nicely, making any more minor adjustments to your cuts if necessary. Use your paintbrush to apply a thin coat of white glue to the paper and fold it back in place. Wipe up any excess glue so that it doesn't stick to the books you're about to stack back on top to hold it in place while the glue dries. (I didn't say bookbinding was a quick process...)
I'm using a sheet of scrapbook paper for the cover on the outside this time, because I have some lovely scrapbook paper on hand, and it's big enough (12" by 12").
Before we start cutting the paper, let's get the book boards ready. As I said in part one of this tutorial, I use whatever I have handy, cereal boxes, chipboard, whatever. I'm tempted to call up an acquaintance of mine that runs a framing shop (as in picture framing) and asking them for their cast off mat board scraps. I would not use corrugated cardboard, though, you need the density of a solid material. When I use cereal boxes, I glue the printed sides together and stack books on top so that it dries nice and flat, then cut it out carefully when it's dry.
Measurements for the book boards should be as follows: The front and back cover should be 1/8" wider than your book blank (that's what I'm calling all the signatures that are all sewn and glued together), and 1/4" taller than the book blank. The spine will be the same height as the front and back cover, and 1/8" narrower than the thickness of the book blank at the spine. (Remember when I told you to measure that?)
For the example, our book blank is 8 1/2" by 5 1/2". So, the covers need to be 8 3/4" by 5 5/8". My book measures 1/2" thick, so the spine piece is 8 3/4" by 3/8". That wasn't so hard, now was it?
Now to cut the paper for the cover. I did a little illustration to help explain:


This is one of those instances where I'm going to tell you to use a glue stick. Right now, we just want to hold the book board in place on the paper, but don't want the paper to bubble like it tends to do with "wet" glue. We're going to use white glue later on when we fold the flaps over, and that will hold everything in place permanently, so a glue stick is just fine right now. Stack your heavy books on top again and give it a few minutes to dry.
Now that the glue is dry on the spine of the signatures, glop on a bit more glue, gently pat the fabric in place, and then glue it some more. The fabric needs to be fairly saturated at this point. More waiting for glue to dry, and this one is going to take a while, give it several hours / overnight to dry. Meanwhile, you can finish the cover...
So, now the book boards are glued down with the proper gaps in between, we can start trimming the paper to 1/2" all the way around. Now for the 45 degree angles. Take your time and do this part carefully, so you'll have a nice mitered corner. If you look at the illustration above, notice that the very tip of the book board does not touch the edge. The distance between the very tip of the book board and the edge of the paper should be about the same as the thickness of your book board. In my personal opinion, a little extra is easier to "pretty up" later than if you cut it too closely and have a gap.
We're just about done! Next up is the tricky part, putting it all together!
Bookbinding, Part Two: Stitching the Signatures
Now that you have your signatures ready, time to start stitching them together!
Before you cut your thread, you want to make sure that you'll have enough so that you don't have to add more later. Better to have a little too much than not enough! Take one of your signatures and use that as a measuring tool, advancing it as many times as you have signatures. If you want to get technical, multiply the distance between holes 1 and 8 by the number of signatures, plus about 6-8 inches to give room to tie knots. Our example is 7" (since the holes are 3/4" from either end) and we're using 10 signatures, so we need around 78 inches of thread, which is a little over 2 yards. Cut your thread and run it through the beeswax, then thread the needle. No need to tie a knot.
Cut 3 pieces of binding tape two inches from the estimated thickness of the spine. We'll trim this later.
From here on out, when I say "GO IN", I mean from the spine (the mountain side of the fold) to the inside of the book (the valley side of the fold), and if I say "GO OUT", you're going from the inside of the book through to the spine.
VERY IMPORTANT! Take your time, make sure your thread doesn't hang on anything, and pull slowly to keep it from tangling. Keep the tension taut, but not so tight that you tear your paper. The thread does not go through the binding tape, but just holds it in place. Make sure you catch all the pages of the signature when going through the holes. It helps to open the signature when stitching it.
Grab one signature, keeping them all still facing the same way so your holes line up.
 Once everything is stitched securely, clamp the spine securely between two boards or a stack of heavy books with just a little bit of the spine barely sticking out. Two heavy duty paint stirring sticks (the kind used for 5 gallon buckets of paint) and a pair of "C" clamps would work well. Paint on your white glue with your paintbrush, using a generous amount of glue (but not so much that it drips all over the place). Tuck your thread tails down into the glue. Let this dry thoroughly.
**You will need to measure the exact thickness of the book AT THE SPINE at this point. You can do this right before you apply the glue, while it's clamped down.
While your glue dries, you can start on the cover!
Before you cut your thread, you want to make sure that you'll have enough so that you don't have to add more later. Better to have a little too much than not enough! Take one of your signatures and use that as a measuring tool, advancing it as many times as you have signatures. If you want to get technical, multiply the distance between holes 1 and 8 by the number of signatures, plus about 6-8 inches to give room to tie knots. Our example is 7" (since the holes are 3/4" from either end) and we're using 10 signatures, so we need around 78 inches of thread, which is a little over 2 yards. Cut your thread and run it through the beeswax, then thread the needle. No need to tie a knot.
Cut 3 pieces of binding tape two inches from the estimated thickness of the spine. We'll trim this later.
From here on out, when I say "GO IN", I mean from the spine (the mountain side of the fold) to the inside of the book (the valley side of the fold), and if I say "GO OUT", you're going from the inside of the book through to the spine.
VERY IMPORTANT! Take your time, make sure your thread doesn't hang on anything, and pull slowly to keep it from tangling. Keep the tension taut, but not so tight that you tear your paper. The thread does not go through the binding tape, but just holds it in place. Make sure you catch all the pages of the signature when going through the holes. It helps to open the signature when stitching it.
Grab one signature, keeping them all still facing the same way so your holes line up.
- Go IN through hole 1, leaving about a two inch tail. You'll trim this later.
- Go OUT through hole 2.
- Line up your binding tape and go IN through hole 3, the thread should go over the tape and hold it in place.
- Go OUT through hole 4.
- Over the binding tape and IN at hole 5. (I'm sure you're getting the idea so far, repeat until you get to the end.
- You should end up coming OUT at hole 8 last.
- Stack the next signature on top, lining up the holes.
- Go IN through hole 8 of the second signature. You're going to work your way back to hole 1 now.
- When you get back to hole 1, you should have just come OUT, you'll tie a small knot with your working thread to the tail from the beginning. A square knot is fine.
- Add another signature and continue on, IN through hole 1, etc.
- When you get to the end of signature 3, out at hole 8, insert your needle BETWEEN signatures 1 and 2, between holes 7 and 8, then pull it around. This will wrap the thread around the stitch that holds the two together on the end, locking it in place. This is called a Kettle Stitch, and you will do this at the end of each signature before adding another one.

**You will need to measure the exact thickness of the book AT THE SPINE at this point. You can do this right before you apply the glue, while it's clamped down.
While your glue dries, you can start on the cover!
Bookbinding Tutorial, Part One: Getting Started
Since we have decided to tackle bookbinding, I figured it was time to write an article about how to bind a book. There are a few questions you have to ask yourself before you really jump in.
1. Do you want this book/journal to be archival quality, or use some recycled materials? I'm all for using recycled materials, but if you want this book to stand the test of time, you need to shell out a little money to get the "good stuff" that's all acid-free, etc. This means looking for sturdy web linen binding tape, unbleached linen binder's thread, glue, book board and papers that are all archival quality. I'm sure if you do a little research on the internet, you can find a good place to get all of these things. Since I use recycled materials and other make-do stuff I have on hand, I can live with using scraps of ribbon or bias tape in place of the binding tape, embroidery floss for the binder's thread (crochet cotton might work, too), cereal boxes for the book board, plain ol' white school glue and whatever kind of paper I have lying around.
2. What size to you want this book to be? Or a different way of asking the question, what size is your paper and how much cutting do you feel like doing? Most of the paper that I have on hand measures 8.5" by 11". That's your standard (American) copy/print paper. (They use "A" series paper in the U.K., I believe.) Fold that in half, and you've got 8.5" by 5.5". I think that's usually a good size for a journal. If you cut the paper in half first, then fold it, your paper will end up 4.25" by 5.5". That works as a pretty good size for a pocket journal or address book. Nonetheless, you want your paper to be twice as wide as the finished INSIDE of the book. Generally, the cover is just a tad larger than the paper on the inside to protect the pages inside. So, if I refer to a book as 8.5" by 5.5" from here on out, the finished product will be more like 8 5/8" by 5 3/4". (More on all of this later.)
3. What kind of spine do you want the book to have? So far, I know two ways of hand-stitch binding a book. There are so many more that I haven't tried yet, of course.
Hard cover binding that includes a spine uses a few extra supplies, but your stitching along the spine is covered and protected. You'll need binding tape (it's not actually tape, more like ribbon or bias tape), and the paper or fabric that you use to cover the cover needs to be a good bit wider than your interior pages.
Coptic Stitch binding uses two book boards (covered if you like) and leaves the stitching exposed along the spine. When I do this, I use embroidery floss that coordinates with whatever I use for the cover. The beauty of coptic binding is that you don't have to have such a wide piece of paper, it doesn't need binding tape, and you can use all sorts of different materials for the covers themselves, as long as you can drill holes in it accurately.
Our first session is going to be hard cover binding, because that's what I learned first. We'll cover Coptic binding in a later session. Some of this will make more sense during the class, and/or when I add pictures. Please don't be intimidated by any of this! It's easier than it seems right now, and I'm trying to make the measurements portion as clear as possible. Some of this takes longer to explain than it actually does to do it.
Quick Steps:
Paper for the pages of the book
A Bone Folder for creasing the paper cleanly. An old credit card also works well.
An Awl for piercing the paper. I'm sure you could also use a sharp finishing nail or even an ice pick.
An Old Phone Book. No, I'm not kidding.
A Ruler, both for measuring and cutting against.
A Craft Knife or X-acto Knife, with very sharp blades. I imagine you can use scissors for most of this, but precision is key in some of the cuts.
A Pen or Pencil
A Self-healing Cutting Mat is pretty good. Mine has a 45 degree angle on it, so I don't need to use a Protractor.
Some Extra paper, for protecting your work surface and making a template for hole placement.
Cover Material. Either paper or fabric. It needs to be at least a few inches wider than your inside pages.
Binding Tape. For my book, I'm using some ribbon I found in my craft stash that is 7/8" wide. This is the first time I've tried to use it, so I hope it works. Real Binding Tape is unbleached linen and is 3/8" wide.
Needle, Thread and Beeswax. Real binder's thread is unbleached linen. I've used embroidery floss with success, I'm thinking that crochet cotton will also work. Make sure you pick something that the color won't bleed later on. You need something that's not too thin, so don't try to use regular sewing thread. Consequently, you need a needle that the thread will fit through. It doesn't necessarily need to be all that sharp, since we'll be punching the holes with an awl before stitching. The beeswax is a real frustration saver, though an old candle or even a bar of soap will work. You're going to be working with a pretty long piece of thread, and the wax not only lubricates it, but keeps it from tangling. Just hold your thread against the wax with your thumb and pull it through slowly. You'll see that the thread cuts into the wax eventually, which is good, that wax is now coating your thread.
Glue, I use a combination of a glue stick and white school glue. **Note on using glue sticks: I like using a glue stick for some things, since it doesn't make the paper bubble. However, do not use a glue stick on something that needs to hold strong over time. It might hold for a while, but after a while, it releases. When I write the step by step tutorial down, I'll let you know when I'm using regular glue and when I'm using a glue stick.
Book Board. Recycling wise, I literally take a cereal box (or something similar), glue the large flat pieces together (glossy printed sides together) and cut it out from there. Several passes with a craft knife and you're through. Measurements depend on how much you want the cover to stick up over the pages of your book. I like about 1/8" at the top and bottom and the opening end. So, for our 8.5" x 5.5" book, the boards used will be cut to 8 3/4" by 5 5/8" for each the front and back covers. The spine piece will be cut to the same height, by the exact width of the signatures after stitching and gluing.
A Clamping System. Ideally, you would use two boards and some "C" clamps. But anything that will hold your pages tightly together while the glue dries will work. If you just stack some really heavy books on top (protect them from stray glue drips with some scrap paper) that will work. I actually have two clipboards and spring clamps that I use, and that works well for me.
An Old Paint Brush for applying glue.
Getting Started
Take your interior paper, fold it in half and burnish the crease with your bone folder or credit card or whatever you have. Fold one page at a time, not a stack. If you fold a stack at a time, your fold won't be even. After the pages are folded, take four of the sheets and stack them one inside another (like a little booklet). This is called a SIGNATURE. Four sheets is what I learned, but it's your book! I can see changing the number of sheets in each signature depending on the thickness of the paper. If I were using cardstock, I might stack three sheets instead of four. The more sheets you stack, the more the innermost sheet is going to stick out further than the outermost sheet. (See the drawing below to make this more clear.)
If you're going for an old timey looking book, leave the edges jagged. Deckle the edges if you like (the torn look). If you don't like the jagged look at the edge of the paper, you can face trim the pages. Line up your ruler and go to work with your craft knife. Don't try to cut it all at once, make several passes. Or, head down to a local print shop and ask them to face trim the pages for you. They should only charge you a few bucks, and you'll have a very nice, even cut. As far as the number of pages in your book, the total needs to be divisible by 8. Four sheets of paper folded in half (one signature) = 8 pages in the book. To make the math easy, 40 sheets of paper = 10 signatures = 80 pages.
Here's a little drawing I put together to help explain:

Now that you have your signatures stacked, it's time to get around to punching the holes. Take one extra sheet of paper and fold it in half. Now to do a little measuring. This isn't a completely exact science, just make sure things are pretty even. I like to put my outermost holes 3/4" from the edge of the page. Mark this on the fold. I personally use three pieces of binding tape on my journals. If you're going to make a book that's really big, you might want to do more. Since we're doing three, one ends up in the middle. The width of the binder's tape is important in this step. I put together another diagram to help explain the placement.
The tape should be relatively evenly spaced, and the space between holes 2 and three (and 4 / 5 and 6 /7 respectively) should be just outside the binder's tape.

Now here's the trick with the phone book. Open it up to somewhere around the middle and lay it out on top of your self-healing mat. You'll need to fold your template piece so that your marks are on the inside of the page, then stick it inside one of your signatures. Make sure everything is lined up evenly, and lay the pages down so that the fold fits into the valley of the open phone book. Pierce through the template and through the signature (and probably through some of the phone book) with your awl. Repeat this process for as many signatures as you have, making sure to keep all of the punched signatures facing the same way, in case your template is a little off. When you stack them all up, you should have pretty straight lines of holes. Consistency is more important than perfect measurements in this step. Next up, actually stitching!!
1. Do you want this book/journal to be archival quality, or use some recycled materials? I'm all for using recycled materials, but if you want this book to stand the test of time, you need to shell out a little money to get the "good stuff" that's all acid-free, etc. This means looking for sturdy web linen binding tape, unbleached linen binder's thread, glue, book board and papers that are all archival quality. I'm sure if you do a little research on the internet, you can find a good place to get all of these things. Since I use recycled materials and other make-do stuff I have on hand, I can live with using scraps of ribbon or bias tape in place of the binding tape, embroidery floss for the binder's thread (crochet cotton might work, too), cereal boxes for the book board, plain ol' white school glue and whatever kind of paper I have lying around.
2. What size to you want this book to be? Or a different way of asking the question, what size is your paper and how much cutting do you feel like doing? Most of the paper that I have on hand measures 8.5" by 11". That's your standard (American) copy/print paper. (They use "A" series paper in the U.K., I believe.) Fold that in half, and you've got 8.5" by 5.5". I think that's usually a good size for a journal. If you cut the paper in half first, then fold it, your paper will end up 4.25" by 5.5". That works as a pretty good size for a pocket journal or address book. Nonetheless, you want your paper to be twice as wide as the finished INSIDE of the book. Generally, the cover is just a tad larger than the paper on the inside to protect the pages inside. So, if I refer to a book as 8.5" by 5.5" from here on out, the finished product will be more like 8 5/8" by 5 3/4". (More on all of this later.)
3. What kind of spine do you want the book to have? So far, I know two ways of hand-stitch binding a book. There are so many more that I haven't tried yet, of course.
Hard cover binding that includes a spine uses a few extra supplies, but your stitching along the spine is covered and protected. You'll need binding tape (it's not actually tape, more like ribbon or bias tape), and the paper or fabric that you use to cover the cover needs to be a good bit wider than your interior pages.
Coptic Stitch binding uses two book boards (covered if you like) and leaves the stitching exposed along the spine. When I do this, I use embroidery floss that coordinates with whatever I use for the cover. The beauty of coptic binding is that you don't have to have such a wide piece of paper, it doesn't need binding tape, and you can use all sorts of different materials for the covers themselves, as long as you can drill holes in it accurately.
Our first session is going to be hard cover binding, because that's what I learned first. We'll cover Coptic binding in a later session. Some of this will make more sense during the class, and/or when I add pictures. Please don't be intimidated by any of this! It's easier than it seems right now, and I'm trying to make the measurements portion as clear as possible. Some of this takes longer to explain than it actually does to do it.
Quick Steps:
- Fold pages in half and burnish the crease.
- Nest the pages to form Signatures.
- Make a template for hole placement.
- Pierce the Signatures.
- Measure out, cut and wax the thread. Thread your needle.
- Stitch the signatures together.
- Clamp the signatures, glue it up and let the glue dry.
- Measure the book's thickness at the spine.
- Face trim the pages, if desired.
- Measure and cut book board for front and back cover and the spine.
- Measure and cut cover material.
- Glue the book board to the cover material.
- Miter the corners of the cover material, score if necessary and fold it over the book board. Glue in place. Stack some heavy books on top to let the glue dry nice and flat.
- Attach the fly pages to the book blank (the inside pages of the book).
- Glue the fly pages to the cover. Stack more books on top and let it dry thoroughly.
Paper for the pages of the book
A Bone Folder for creasing the paper cleanly. An old credit card also works well.
An Awl for piercing the paper. I'm sure you could also use a sharp finishing nail or even an ice pick.
An Old Phone Book. No, I'm not kidding.
A Ruler, both for measuring and cutting against.
A Craft Knife or X-acto Knife, with very sharp blades. I imagine you can use scissors for most of this, but precision is key in some of the cuts.
A Pen or Pencil
A Self-healing Cutting Mat is pretty good. Mine has a 45 degree angle on it, so I don't need to use a Protractor.
Some Extra paper, for protecting your work surface and making a template for hole placement.
Cover Material. Either paper or fabric. It needs to be at least a few inches wider than your inside pages.
Binding Tape. For my book, I'm using some ribbon I found in my craft stash that is 7/8" wide. This is the first time I've tried to use it, so I hope it works. Real Binding Tape is unbleached linen and is 3/8" wide.
Needle, Thread and Beeswax. Real binder's thread is unbleached linen. I've used embroidery floss with success, I'm thinking that crochet cotton will also work. Make sure you pick something that the color won't bleed later on. You need something that's not too thin, so don't try to use regular sewing thread. Consequently, you need a needle that the thread will fit through. It doesn't necessarily need to be all that sharp, since we'll be punching the holes with an awl before stitching. The beeswax is a real frustration saver, though an old candle or even a bar of soap will work. You're going to be working with a pretty long piece of thread, and the wax not only lubricates it, but keeps it from tangling. Just hold your thread against the wax with your thumb and pull it through slowly. You'll see that the thread cuts into the wax eventually, which is good, that wax is now coating your thread.
Glue, I use a combination of a glue stick and white school glue. **Note on using glue sticks: I like using a glue stick for some things, since it doesn't make the paper bubble. However, do not use a glue stick on something that needs to hold strong over time. It might hold for a while, but after a while, it releases. When I write the step by step tutorial down, I'll let you know when I'm using regular glue and when I'm using a glue stick.
Book Board. Recycling wise, I literally take a cereal box (or something similar), glue the large flat pieces together (glossy printed sides together) and cut it out from there. Several passes with a craft knife and you're through. Measurements depend on how much you want the cover to stick up over the pages of your book. I like about 1/8" at the top and bottom and the opening end. So, for our 8.5" x 5.5" book, the boards used will be cut to 8 3/4" by 5 5/8" for each the front and back covers. The spine piece will be cut to the same height, by the exact width of the signatures after stitching and gluing.
A Clamping System. Ideally, you would use two boards and some "C" clamps. But anything that will hold your pages tightly together while the glue dries will work. If you just stack some really heavy books on top (protect them from stray glue drips with some scrap paper) that will work. I actually have two clipboards and spring clamps that I use, and that works well for me.
An Old Paint Brush for applying glue.
Getting Started
Take your interior paper, fold it in half and burnish the crease with your bone folder or credit card or whatever you have. Fold one page at a time, not a stack. If you fold a stack at a time, your fold won't be even. After the pages are folded, take four of the sheets and stack them one inside another (like a little booklet). This is called a SIGNATURE. Four sheets is what I learned, but it's your book! I can see changing the number of sheets in each signature depending on the thickness of the paper. If I were using cardstock, I might stack three sheets instead of four. The more sheets you stack, the more the innermost sheet is going to stick out further than the outermost sheet. (See the drawing below to make this more clear.)
If you're going for an old timey looking book, leave the edges jagged. Deckle the edges if you like (the torn look). If you don't like the jagged look at the edge of the paper, you can face trim the pages. Line up your ruler and go to work with your craft knife. Don't try to cut it all at once, make several passes. Or, head down to a local print shop and ask them to face trim the pages for you. They should only charge you a few bucks, and you'll have a very nice, even cut. As far as the number of pages in your book, the total needs to be divisible by 8. Four sheets of paper folded in half (one signature) = 8 pages in the book. To make the math easy, 40 sheets of paper = 10 signatures = 80 pages.
Here's a little drawing I put together to help explain:

Now that you have your signatures stacked, it's time to get around to punching the holes. Take one extra sheet of paper and fold it in half. Now to do a little measuring. This isn't a completely exact science, just make sure things are pretty even. I like to put my outermost holes 3/4" from the edge of the page. Mark this on the fold. I personally use three pieces of binding tape on my journals. If you're going to make a book that's really big, you might want to do more. Since we're doing three, one ends up in the middle. The width of the binder's tape is important in this step. I put together another diagram to help explain the placement.
The tape should be relatively evenly spaced, and the space between holes 2 and three (and 4 / 5 and 6 /7 respectively) should be just outside the binder's tape.

Now here's the trick with the phone book. Open it up to somewhere around the middle and lay it out on top of your self-healing mat. You'll need to fold your template piece so that your marks are on the inside of the page, then stick it inside one of your signatures. Make sure everything is lined up evenly, and lay the pages down so that the fold fits into the valley of the open phone book. Pierce through the template and through the signature (and probably through some of the phone book) with your awl. Repeat this process for as many signatures as you have, making sure to keep all of the punched signatures facing the same way, in case your template is a little off. When you stack them all up, you should have pretty straight lines of holes. Consistency is more important than perfect measurements in this step. Next up, actually stitching!!
Tuesday, May 3, 2011
Next week: book binding
Had a good time today! Might do more on quilling again if you guys want to see more.
We decided that our next meeting will be held same time, same place. Tuesday at 1:00 at Kim's house (thank you Kim!).
The topic will be book binding. I think since the whole process requires so many different steps of waiting for glue to dry, its going to be more of an exhibition-style meeting, where you'll mostly just watch. You might want to bring a notepad if you want to take notes. Also, I'm still using cereal boxes for book covers, so if you guys have any, bring 'em on! (This isn't limited to cereal, per se, just chipboard boxes with large unfolded areas are good.)
I'll post more info about book binding later, when I'm actually at my computer.
Happy crafting!
Samantha
Saturday, April 30, 2011
Soda can crafts?
Does anyone have any ideas for something to make from soda cans? I end up with a bunch of them, and while I do recyycle them, I would love to make something from them.
Reminder for our next meeting
Don't forget, we have scheduled our next meeting for this Tuesday at 1:00 at Kim's house in North Augusta. Please let us know if you need directions. I'm bringing my little ones and the craft supplies, if you guys want to bring snacks or anything, go for it!
Also, I would love it if someone could take some digital photos of the process while we're together to post a tutorial on the blog.
Do any of you have pics you would like to post? Let me know!
Can't wait to see y'all!
Samantha
Wednesday, April 27, 2011
Hey you guys! Lookie what I made!
I need your cereal boxes. No, really. I am working on a few bookbinding projects, and I've found that cereal boxes (chipboard) make good hardback covers. I also need brown paper bags, if you do that sort of thing. I tend to use my fabric bags, and it always seems like such an inconvenience to the grocery store employees to ask for paper (but I'm going to do it anyway for a while).
I just completed two Coptic bound books, taking pictures all the way on the second one, but the pictures of the actual stitching process came out all blurry. Here's a picture of the first one:
 I love the look of the exposed stitching on the spine.
 Sorry for the not so perfect pictures, but they were the ones that came out the best.
Would you guys be interested in seeing this, or should I just not worry about it?
The stitching process isn't actually hard, but I think pictures would help explain what I'm talking about.
One thing is, though. Bookbinding is a little on the slow side. I like this process because there's less down time waiting for glue to dry. Doing a hardcover book with a spine, lots of waiting. I'm an instant gratification kind of girl.
Also, here's a (not-so-good) picture I made for my mother for her birthday.
 This is all paper in a shadowbox frame. The picture doesn't do it justice. There are spacers between the layers, so you get an awesome shadow effect. She really liked it.
And... This isn't finished yet, but here's a picture of the cover:
 For those of you that don't recognize it on sight, it's supposed to be a replica of River Song's Diary from Doctor Who. My version, anyway... I think I still might tweak the dimensions of it, but it's a good first try!
Yes, that cover is embossed. Not a simple thing to do. Even more time waiting for glue to dry, but the end result is amazing.
Anyway... Tell me what you think?
I just completed two Coptic bound books, taking pictures all the way on the second one, but the pictures of the actual stitching process came out all blurry. Here's a picture of the first one:


Would you guys be interested in seeing this, or should I just not worry about it?
The stitching process isn't actually hard, but I think pictures would help explain what I'm talking about.
One thing is, though. Bookbinding is a little on the slow side. I like this process because there's less down time waiting for glue to dry. Doing a hardcover book with a spine, lots of waiting. I'm an instant gratification kind of girl.
Also, here's a (not-so-good) picture I made for my mother for her birthday.

And... This isn't finished yet, but here's a picture of the cover:

Yes, that cover is embossed. Not a simple thing to do. Even more time waiting for glue to dry, but the end result is amazing.
Anyway... Tell me what you think?
Sunday, April 24, 2011
Paper quilling meeting?
It has been a busy weekend around here! I hope everyone is well and good!
When do you guys want to have our next meeting? This week? Next week? Leave a comment and let me know!
Tuesday, April 19, 2011
Getting bogged down in details
I've been working on really and truly cleaning my house. The crafter in me is screaming to be let loose again, but I keep telling myself that I'll enjoy crafting more if I have a tidy space to do it in. I've gotten a lot done, but I've had to catch myself on numerous occasions from getting sidetracked, or in my case derailed.
Here's how it starts. I'm cleaning the kitchen, and I need to put away the waffle iron. I notice the shelf it goes on is a little dirty, so I think "this'll only take a minute..." Before I know it, I've got stuff strewn all over the kitchen that was almost clean a short while ago, scrubbing parts of my kitchen that nobody ever sees and certainly wasn't hurting anyone for it to be a little dirty. Then, the littles need something and I have to stop what I'm doing. Next thing I know its time to cook dinner and there's stuff all over the kitchen that will have to be put away before I can cook. Not too long after that, the girls are standing at the baby gate screaming at me because they're hungry. All because the shelf was a little dirty.
This is only one little scenario, of course. It's like that for my whole house. Yesterday I was putting away the girls clean laundry and launched into an all-day affair of cleaning out their closets and dressers. It needed to be done anyway, and I'm not mad at myself for doing it. The weather is getting nice and there is no need for winter coats. I would much rather hang clothes in the closet than fold them and put them in the dresser. Dressers at my house end up a trashed mess full of wrinkled clothes within a week. But I only have so many kid's clothes hangers, so stuff had to come out of the closet in order to hang... blah blah blah. (See? It's happening here too. Sidetrack city!)
This also only happens when I'm in full-blown cleaning mode. Most of the time, I would have just tossed the waffle iron up there and gone about my business. But lately, I really want my house clean. And organized. I think that if I just can manage to get it cleaned up and organized things will be easier to keep clean. The living room is a million times easier to tidy since we rearranged it and cut down on the number of toys that "live" in the living room.
The funny thing is, I tease my mother about doing the same thing. I tell her, "Just clean the public spaces, mama!" Here I am, doing the same thing... *sigh*
So, here's a few things that I think will help with my cleaning ADD.
1.) Set up lists, complete with priority.
2.) If I'm working in one room and find something that needs to go to another room, start piles or baskets sorted by destination and take them after I'm done with the room I'm working on.
3.) A place for everything, and everything in it's place. I'm working on this part. I have more things than I have space at the moment, so I'm trying to find a good permanent home for everything, and get rid of as much as I can. If I don't think I need it right away but can't bear to part with it, I'm putting it in storage. That's the plan, anyway.
4.) Do a little at a time. Maybe clean out two kitchen cabinets at a time, instead of all of them at one time.
5.) Teach the girls to clean up their toys. Wish me luck.
I'm not saying that I'll be completely faithful to these, but I'm at least going to try. Of course, when it comes time to do my craft room, all the rules are out the window. But I'm at least saving that for a day or weekend when I have someone around to help with the littles.
So, does any of this happen to you?
I can't wait to get crafting again. I'm taking a break from my overhaul today to rest, maybe I'll get to make at least a little something.
Happy Crafting!
Here's how it starts. I'm cleaning the kitchen, and I need to put away the waffle iron. I notice the shelf it goes on is a little dirty, so I think "this'll only take a minute..." Before I know it, I've got stuff strewn all over the kitchen that was almost clean a short while ago, scrubbing parts of my kitchen that nobody ever sees and certainly wasn't hurting anyone for it to be a little dirty. Then, the littles need something and I have to stop what I'm doing. Next thing I know its time to cook dinner and there's stuff all over the kitchen that will have to be put away before I can cook. Not too long after that, the girls are standing at the baby gate screaming at me because they're hungry. All because the shelf was a little dirty.
This is only one little scenario, of course. It's like that for my whole house. Yesterday I was putting away the girls clean laundry and launched into an all-day affair of cleaning out their closets and dressers. It needed to be done anyway, and I'm not mad at myself for doing it. The weather is getting nice and there is no need for winter coats. I would much rather hang clothes in the closet than fold them and put them in the dresser. Dressers at my house end up a trashed mess full of wrinkled clothes within a week. But I only have so many kid's clothes hangers, so stuff had to come out of the closet in order to hang... blah blah blah. (See? It's happening here too. Sidetrack city!)
This also only happens when I'm in full-blown cleaning mode. Most of the time, I would have just tossed the waffle iron up there and gone about my business. But lately, I really want my house clean. And organized. I think that if I just can manage to get it cleaned up and organized things will be easier to keep clean. The living room is a million times easier to tidy since we rearranged it and cut down on the number of toys that "live" in the living room.
The funny thing is, I tease my mother about doing the same thing. I tell her, "Just clean the public spaces, mama!" Here I am, doing the same thing... *sigh*
So, here's a few things that I think will help with my cleaning ADD.
1.) Set up lists, complete with priority.
2.) If I'm working in one room and find something that needs to go to another room, start piles or baskets sorted by destination and take them after I'm done with the room I'm working on.
3.) A place for everything, and everything in it's place. I'm working on this part. I have more things than I have space at the moment, so I'm trying to find a good permanent home for everything, and get rid of as much as I can. If I don't think I need it right away but can't bear to part with it, I'm putting it in storage. That's the plan, anyway.
4.) Do a little at a time. Maybe clean out two kitchen cabinets at a time, instead of all of them at one time.
5.) Teach the girls to clean up their toys. Wish me luck.
I'm not saying that I'll be completely faithful to these, but I'm at least going to try. Of course, when it comes time to do my craft room, all the rules are out the window. But I'm at least saving that for a day or weekend when I have someone around to help with the littles.
So, does any of this happen to you?
I can't wait to get crafting again. I'm taking a break from my overhaul today to rest, maybe I'll get to make at least a little something.
Happy Crafting!
Saturday, April 16, 2011
Next meeting: Quilling
I meant to post this much much earlier, my apologies. My littles are still not quite used to our "new" living room (which still isn't 100 % complete) and they have not wanted mommy sitting at the computer, among other things.
I need to know who would like to have a meeting on Tuesday or Wednesday (the 19 or 20th). Kim was nice enough to volunteer her home again for us, thanks Kim!
I'll bring all of the craft stuff we'll need for the session, so you guys just need to show up!
Also, maybe one of you can take some pictures for us to post on the blog, for those who can't make it to the meeting. I know I'm sorely lacking in that department, but I can't seem to take clear pictures of objects.
Let us know!
Happy crafting!
Samantha
Thursday, April 14, 2011
Changed it again.
Yeah, I changed the layout again for the website. I like this header better, I spent more time on it. D'ya think it's too busy, or hard to read?
Wednesday, April 13, 2011
A wrench in the works.
Hubby's new computer came in yesterday, and it looks really cool. However, it's such a big honking monster of a computer tower and won't fit in the space of his computer desk. *sigh* Now we're trying to come up with some kind of idea to make it all work. The computer looks really cool, and I wouldn't mind seeing the front of it, but I don't want it out in the middle of everything, and most definitely can't have it accessible to little hands. Modifying his current computer desk (which I modified enough by attaching a piece of beadboard paneling to the back to hide cords since it's not against a wall) isn't going to work all that well. The only thing I can think of is to look for another computer desk that will accommodate the tower, or build one.
*headdesk*
Well, I did say this was all going to need a little tweaking, didn't I?
*headdesk*
Well, I did say this was all going to need a little tweaking, didn't I?
Subscribe to:
Posts (Atom)